Avoltech's Website
Computer Vision Sudoku Solver
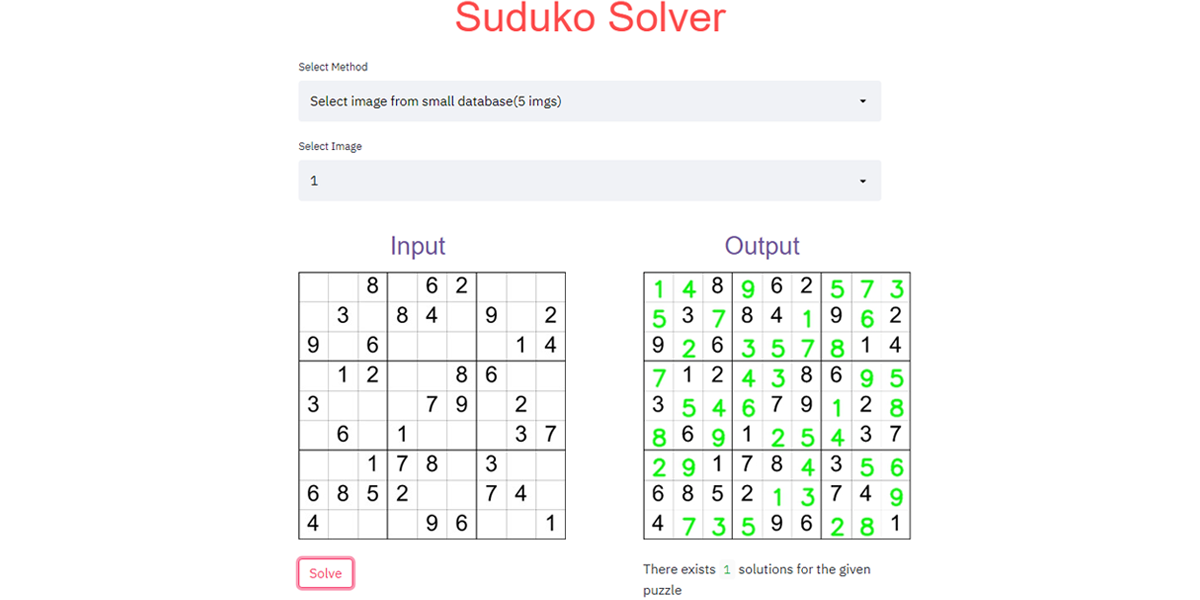
Sudoku is a logic based numerical puzzle, where your aim is to fill a 9 x 9 grid with numbers from 1 to 9, such that each column, each row and each of the 3 x 3 sub grids is filled without repeating the digits. We will build an application that uses Computer Vision to read a sudoku puzzle and then solve it using backtracking algorithm. That means that we will feed a image of a incomplete Sudoku puzzle as a input and the program will then output the image of the completed Sudoku puzzle.
Lets breakdown the task we have at hand:
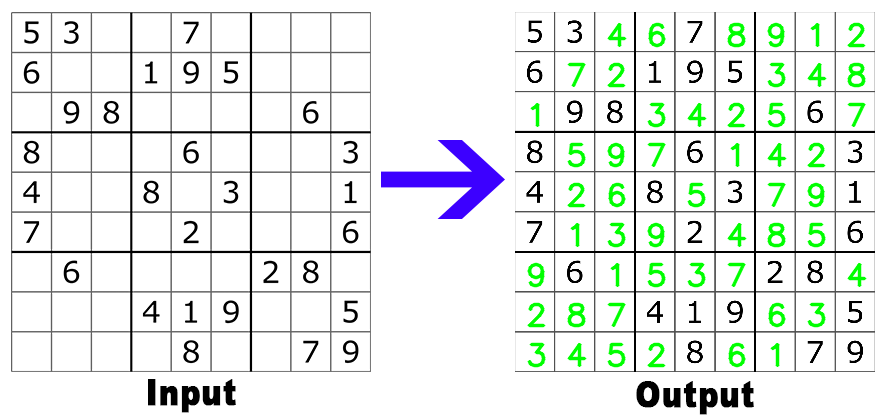
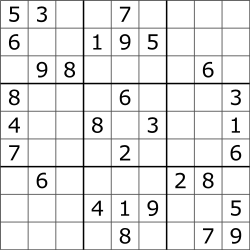
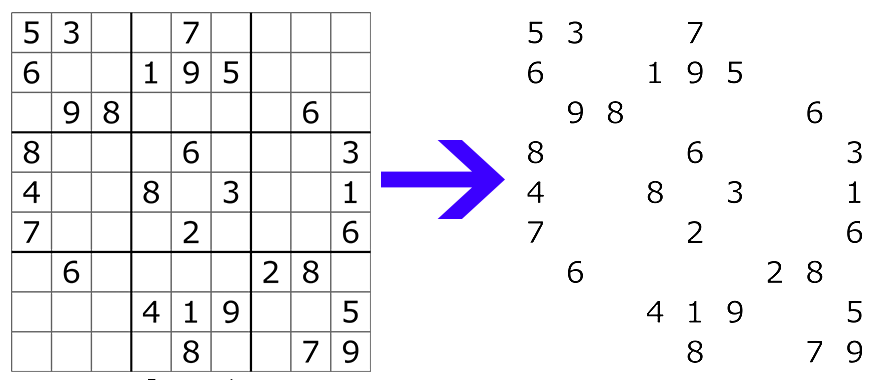
Lets say this image is our input puzzle.
Major Step 1 (Digit Detection):
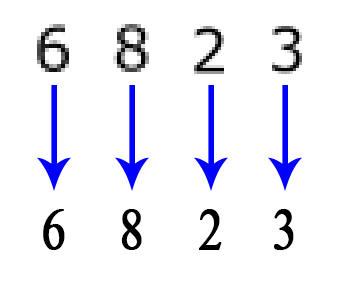
The first major step will be to detect the numbers in the image.
Major Step 2 (Digit Identification) :
The digits are detected, but these are just pixel values for the computer.
The next step would be to identity what the numbers are, using those pixel values.
Major Step 3 (Grid Reconstruction and Solving):
Once we have the digits detected we can then get their location on the grid.
After constructing the entire puzzle grid in a 2D array, we can solve it using backtracking algorithm.
Now lets look at each of the major steps in detail.
Major Step 1 (Digit Identification):
We’ll be using the OpenCV library for python for this image processing task.
The first step after we get the input image, would be to get rid of the grid lines, so that we can easily detect the numbers.
To detect the grid lines we will be using OpenCV’s HoughLines function. After detecting these grid lines, we can draw white lines over them and voila, the grid lines have disappeared.
After getting rid of the grid lines we can use OpenCV’s findContours function to detect the numbers.
findContours function will find all the separate blocks of pixels in the images, and as the only things remaining on the image are numbers, they will be detected.
Major Step 2 (Digit Detection):
Great! We have detected the digits in the image now we need to identify what the digits actually are. This is not as easy as its seems!
The easy way out could be to have images of the numbers already with us, and then compare the images of the digits we have with us to the digits we just detected. But what’s the fun in that?
So, we will build and train our own Machine Learning model to identify the digits.
Minor Step 2.1:
The first step would be to get the dataset to train our ML model on. We need images of digits and their label for this task. Now, what’s the most famous digit dataset out there?
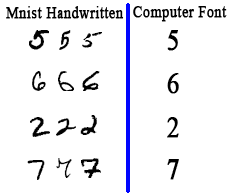
That’s right the MNIST handwritten digit dataset. But the problem is that MNIST is a handwritten digit dataset. The handwritten digits are slightly and sometimes very different form the computerized fonts. So even if we were to train out model on MNIST dataset with 99% accuracy, and then use it on the digits we captured from the previous step, we would not get the right predictions all the time. This happens because handwritten digits and computer font digits are different from each other. From my experience the model gets confused with the MNIST handwritten ‘5’ and computer font ‘6’ and MNIST handwritten ‘7’ and computer font ‘2’ as well.
So, how to we tackle this problem?
Hmm… why not build our own computer font dataset instead!
This might seem hard at first, but is very easy!
We’ll use PIL (Python Imaging Library) and OpenCV together for this task.
The reason to use PIL image is because its easier to use custom fonts using the ImageFont from PIL.
The procedure for creating the dataset will be as follows:
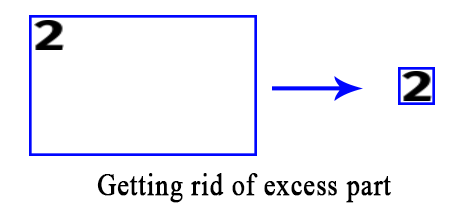
Download a few fonts for diversification purpose. Use PIL library to load the custom fonts and draw the numbers on a blank image. Use OpenCV’s findContours and boundingRect functions to crop the numbers from the image, i.e. get rid of the excess part.
-
Next resize the image to 32 x 32 pixel and save it into the proper directory (because our ML model will require same dimensional images)
-
Repeat step 2 to 4 with different font and different font size.
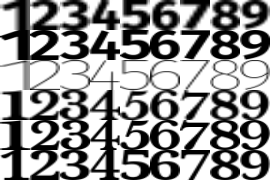
This is a glimpse of our newly created dataset
Minor Step 2.2:
Great we have our dataset ready.
The next step would be to train a Machine Learning model on this dataset.
As our digit prediction task is not that hard we’ll simply use a Support Vector Machine Classifier with default parameters.
Procedure:
Import the required libraries Load the dataset images Split the data in training and testing set Pre-processing the dataset.(Normalizing the pixel values, i.e. converting the pixels that are in the range 0 to 255 (integer) to the range 0 to 1 (float). This is done because models generally performs better when the inputs are normalized.) Building the model Fitting data to the model Evaluating the model Saving the model
Minor Step 2.3:
Now that we have trained and saved our model we’ll use it to identify the digits.
We’ll take the digits that we got from major step 1 and feed it to the model individually and get the output.
Major Step 3 (Grid Reconstruction and Solving):
Now that we are able to recognize and identify the digits, its time to get the location of the digits on the grid and solve the puzzle.
First, to get the location of the digit on the image, we’ll use OpenCV’s boundingRect function on the detected digit contour. The boudingRect function will give us the x, y coordinates of the contour and its height and width as well. We’ll save these coordinates along with the digit in in a list.
The next step would be to use backtracking to solve the puzzle. Backtracking can be defined as a general algorithmic technique that considers searching every possible combination in order to solve a computational problem. There is a nice article about backtracking is Sudoku specifically on GeeksForGeeks at https://www.geeksforgeeks.org/sudoku-backtracking-7/ which you can check out for more detailed explanation.
But in simple terms this is what the algorithm does, it goes through each of the unfilled cells in puzzle, tries to put a valid number between 1 to 9 by checking the rows, column and the sub grid (3x3) for that cell.
Once it finds a possible number it fills the cell with that number and moves to next cell and does the same thing. If it is not able to find any valid number for this cell, than that means our previous assumption was wrong and so the program goes back a step (backtracks) and changes the previous number.
It keeps on doing this until all the cells are filled (or until it reaches a point where it has tried all possible combinations, and failed to find any solution. In that case, for the given puzzle, a valid solution does not exist).
(Note that sometimes backtracking can consume lot of time if the puzzle is too hard)
Finally, after we have got a solution to the puzzle, we’ll fill the image with the solution.
To do this we’ll divide the image width and height by 9 and using this geometry, plot the solution numbers on the grid.
And last but not the least we’ll save the image.
There you have it, you have solved the puzzle.
You can play around with the deployed version of the solver over here: https://sudukosolver-opencv.herokuapp.com/
Note:
- This is deployed using the free version of Heroku Cloud and hence might take a while to load initially.
- (future work) The images need to be, as specified on the site. To have the program work on different angles and skewed image, preprocessing can be done on the image before feeding it to the algorithm, this can be easily done using OpenCV
You can find the code to this project at this GitHub repo: https://github.com/Avoltech/Suduko-Solver-OpenCV